
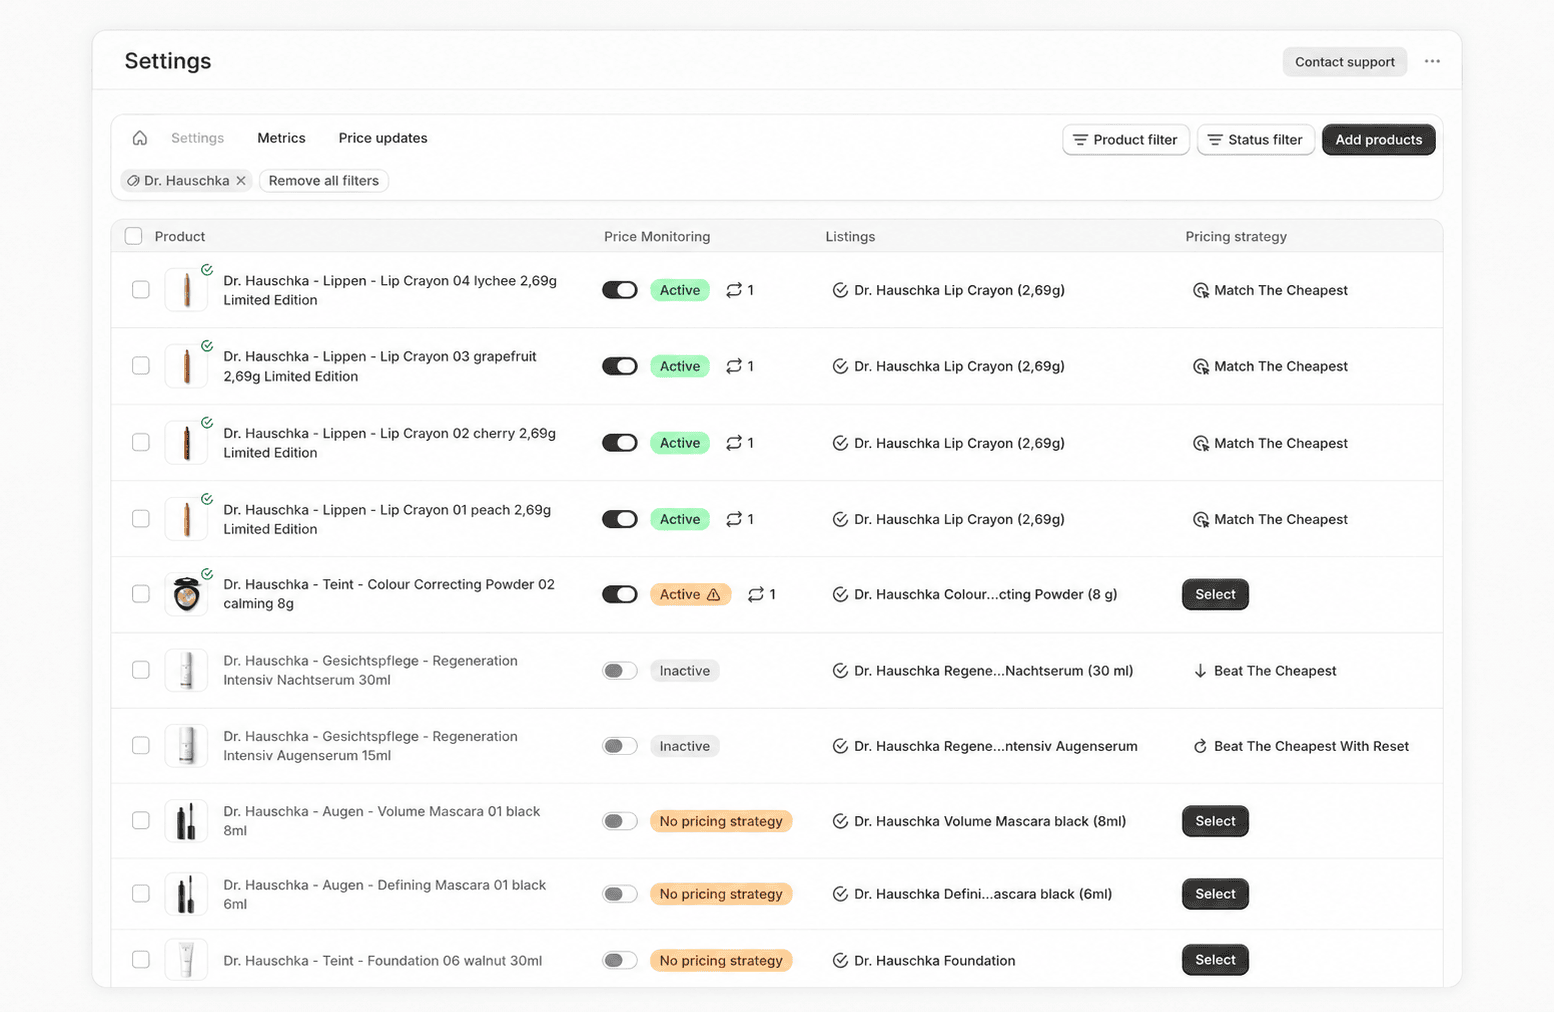
Product settings with the product filter „Dr. Hauschka“ and the status filter „Active“ applied
Tabs and filters
Above the table you switch between four views of the same products:- The home icon leads to the app’s home page.
- Settings is the table described here.
- Metrics opens the product metrics.
- Price updates opens the pending price changes.
Add products: Use this button to take more products into monitoring. See Add products.
The table
The table has four columns:Price monitoring
The Price Monitoring switch starts or stops monitoring for a variant. Once it is active, the regular measurements (synchronizations) of the listing begin and credits are consumed. To switch monitoring on, two prerequisites must be met:
A pricing strategy is not required to activate. Without one, however, no price changes are generated. As long as a prerequisite is missing, the switch stays disabled and the row shows the reason as a status badge.
Next to active rows, a button shows the number of daily synchronizations. It opens the Synchronization settings for that listing — see Synchronization.
If activating exceeds your plan’s daily credit limit, the Daily credit limit reached dialog appears with an upgrade option. See Credits and Billing.
Listings
The Listings column shows the listings connected per configured market, with a marketplace icon and a count. Connect or Select listing opens the Connect listing modal, where you search for and assign a listing. The full description of the modal and the listing statuses is under Connect listings. You configure which markets are available in Settings under Markets.Pricing strategy
The Pricing strategy column shows the assigned strategy or the Select button. It opens the configuration dialog. Its structure is described under Strategy settings, the individual strategies under Pricing strategies. You can save a finished configuration as a template and apply it to more products. In shops with multiple markets, this dialog also lets you set the Market for price changes for this variant, overriding the shop-wide default. Learn more under Strategy settings.Edit several products at once
When you select products with the checkboxes, an action bar with three menus appears above the table. Select pricing strategy: Apply a saved template to all selected products, or create a new strategy via Create new pricing strategy. Navigation: Jump to the matching views — each filtered to the selection:
Edit: This menu bundles the bulk actions: